Time to read: 5 min read
Eggbot
From previous years I had a pair of stepper motors and drivers, but I failed to make them work during experimentation, which was so discouraging at the time, that I just put them away and forgot about them.
Seeing the inner workings of my 3D printer gave me some insight into how beautiful and precise stepper configurations can be. Having learnt a bunch of lessons in electronics in the past years made me want to have a go at it again, and see if I can succeed this time.
There's tons of guides on how to wire stepper drivers, and sure enough, there's two main errors I noticed I had made. Firstly, there's always an enable pin that I'm ignoring. Just like with the 74HC595 digital multiplexers, there's an enable pin on A4988 stepper drivers too. In the final setup I'm using TMC2208 drivers, because they're much more silent due to more accurate wave generation. Secondly, turns out some stepper drivers won't run motors on 5V: they need rather 12 Volts, or more. I know for sure, that I couldn't have produced that a few years ago, but now that I have the necessary equipment to supply that voltage, the motors were finally turning.
Quick anecdote: I love the fact that my 3D printer fits inside a little shelf (desk space is too precious). It inspired me to look into small CNC machines for various purposes. I really like the ANT CNC. It looks awesome, prudes amazing results when milling PCBs, and falls on the cheaper side of DIY CNCs. The team wanted it to fit in a drawer, and I really like that both motors stay fixed during operation. On the other hand, it probably isn't suited for a working of 40cm or bigger, and it probably won't handle aluminum. High quality linear rails, like the Cetus has, aren't seen often in the DIY community, for obvious reasons.
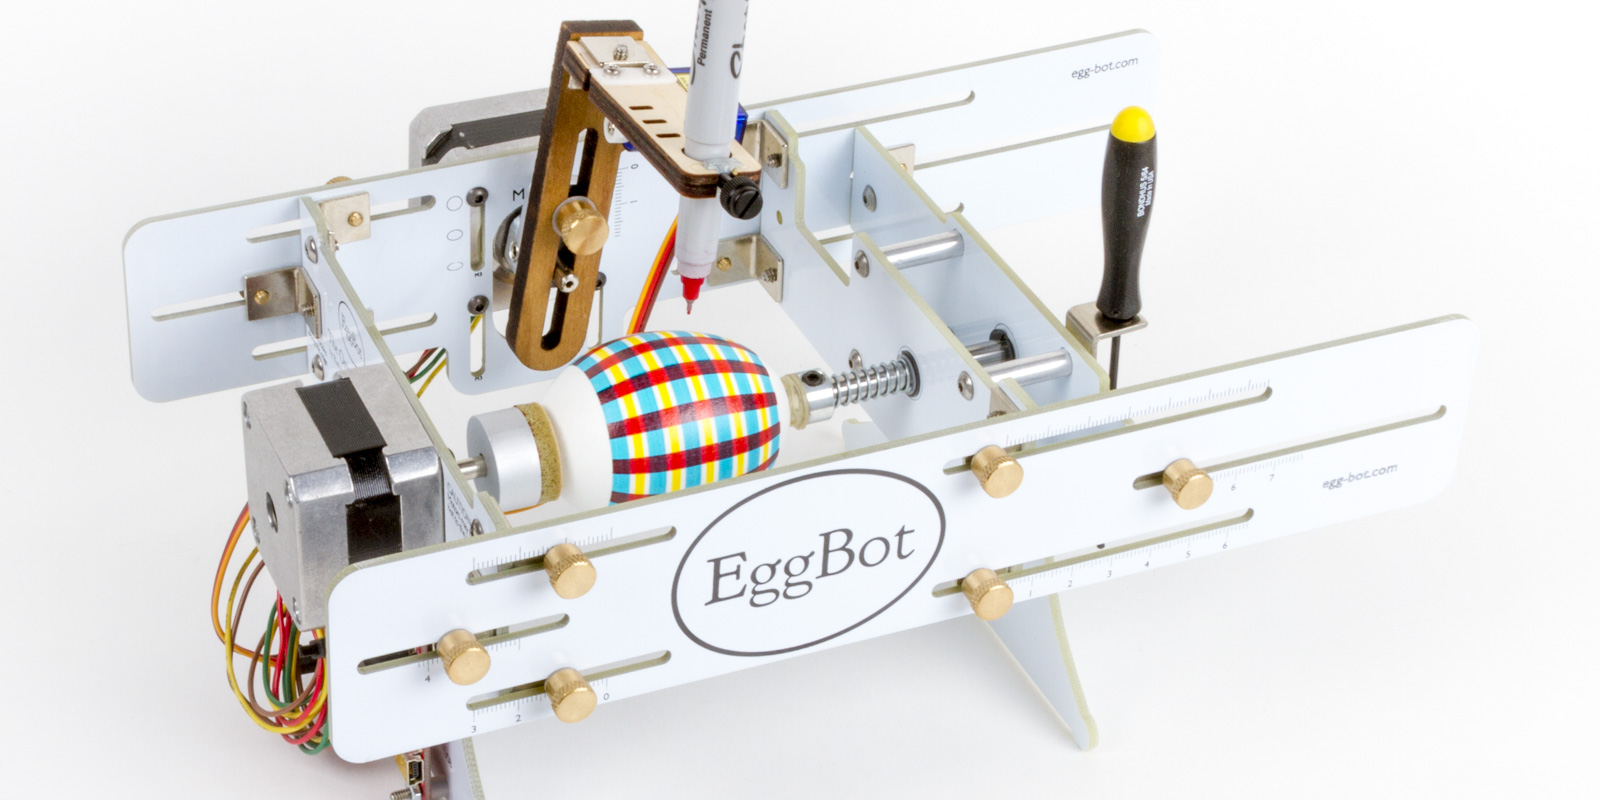
So as I was browsing cnc related forums, I came across the "Egg Painter Mini" instructions, a derivative of the OG Eggbot. Perfect! I have steppers, I have servos, and I can print parts! I decided I would use the Inkscape extension and Arduino program as is, but that I would design my own parts to print.
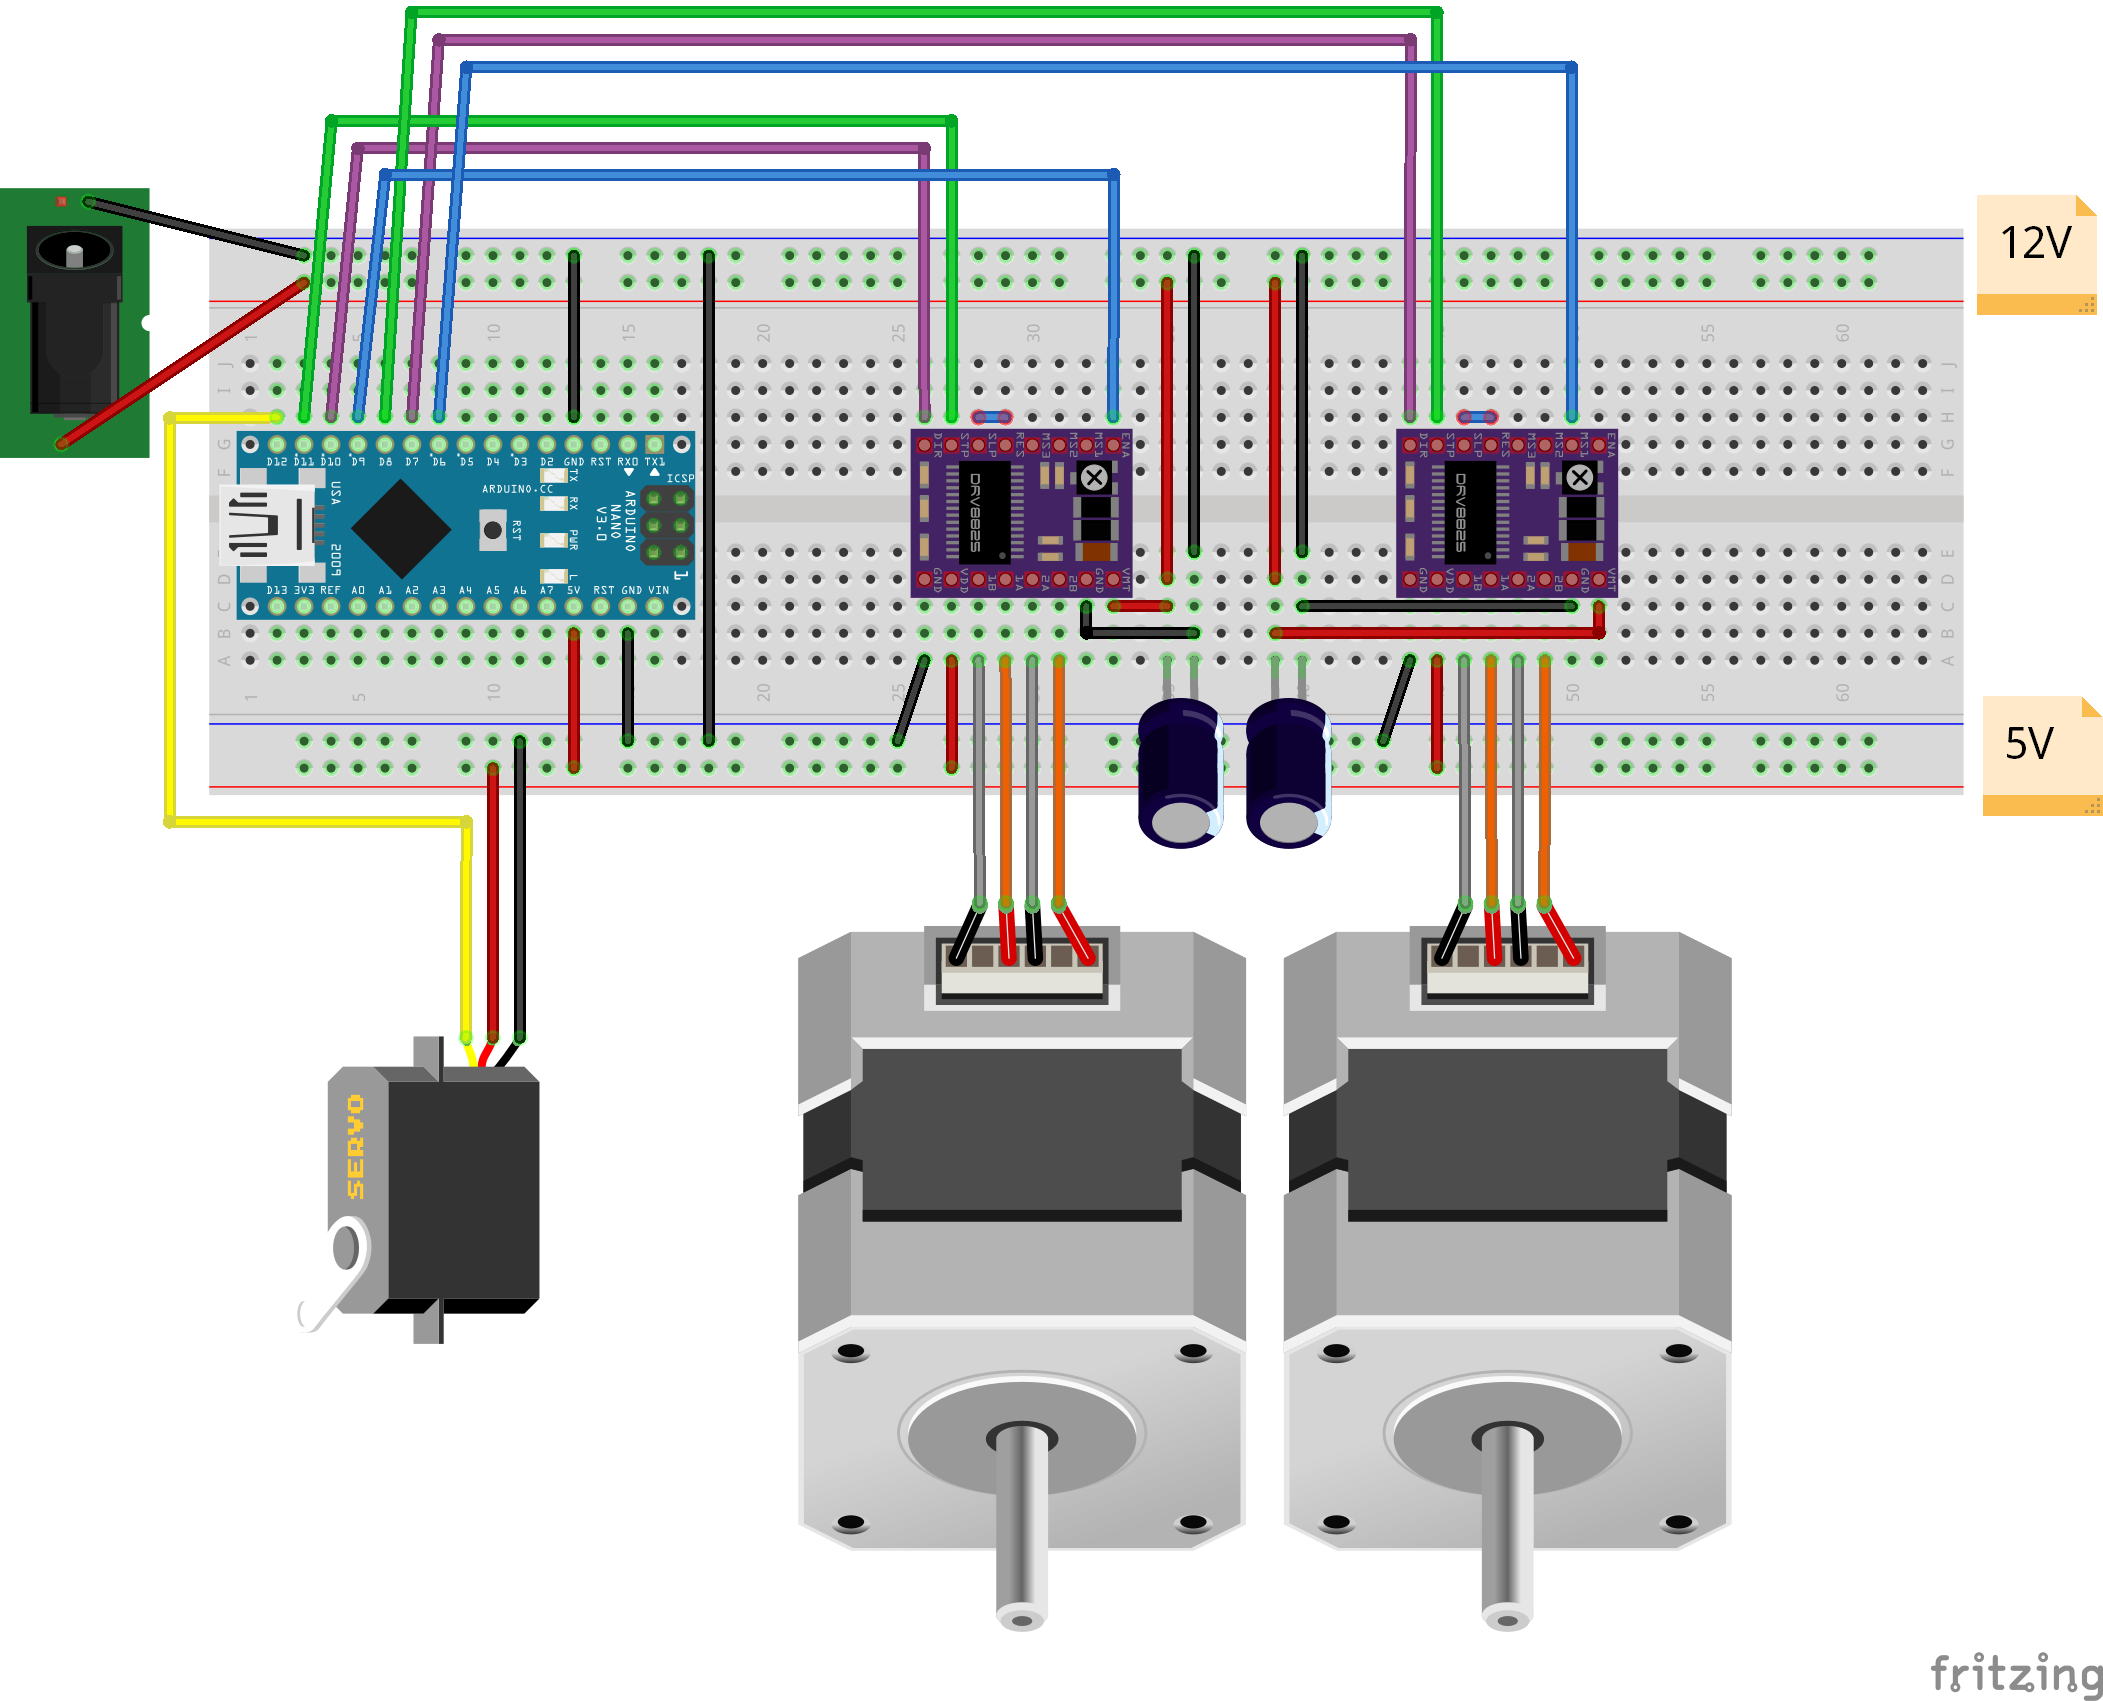
Below is the breadboard schematic that I used, as I didn't intend to assemble electronics permanently for this toy. The Arduino Nano pins that I used have to be adjusted in the .ino program which is referenced in the instructions that I linked earlier. Fritzing has these DRV8825 stepper drivers in the library, but I actually used TMC2208 ones, which are amazingly silent. The sketch here shows how I wired them, and I think that these drivers are pin compatible, but I haven't tested that. Don't forget to adjust the motor current setting of the drivers, otherwise they'll overheat. I set mine to approximately 0.6V following these instructions, and saw them only get moderately warm to the touch.
In hindsight, the large walls I designed on the sides don't permit the pen to tilt to the extremes, and I should have accounted for that. But it's not too bad. What's more important is that larger eggs won't fit! I have only room for eggs that are of average size, or maybe 1mm larger, but anything beyond that won't fit.
The program is awesome though. I had to edit the Arduino program to define the correct pins, but apart from that it works fine. What's not explained though, is that if an Arduino IDE is open, or if Cura is open, the eggbot extension fails to connect to the serial port of the Arduino. Both of those programs have to be closed, and it took me a good amount of time to figure that out.
The stepper drivers were getting hot really fast, and I noticed them pulling lots of current. That's because they have a little screw in them to adjust permissible current, which I haven't done yet, so they were overpowering the motors. Apart from doing that, it makes sense to incorporate the enable pins the way they're used in the program. Connecting the enable pins permanently to ground causes the steppers to draw current constantly, even when there is no workload. Cutting down on unnecessary power consumption reduces heat generation too.
Then I just experimented a bit with what the correct servo angles are, and what the real canvas size in Inkscape should be (the eggbot template document size I found is too big for some reason). A great tip for printing text is that if you want it to be written in "single lines" (like handwriting) instead of outlines, simply select the text object, then go to Extensions->Text->Hershey text. This will transform the characters into very nice paths. See for yourself: